Manual Configuration
This plugin requires the creation of a dedicated Moodle user and role, as well as the setup of the Moodle webservices for the archive worker.
Warning
This is the manual configuration process which can be quite involved. Please only use the manual configuration if you consider yourself an advanced user / Moodle administrator.
Automatic Configuration Most users want to use the automated configuration instead.
Create Moodle User and Role
At first, a new Moodle user and a global role need to be created for the Quiz Archiver. It will be used by the archive worker service to access quiz data.
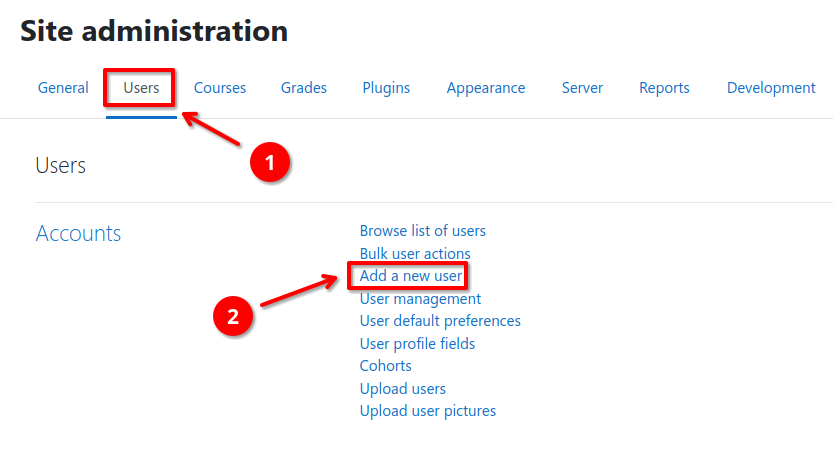
Create a designated Moodle user for the quiz archiver webservice
- Navigate to Site Administration > Users 1 > Accounts > Add a new user 2
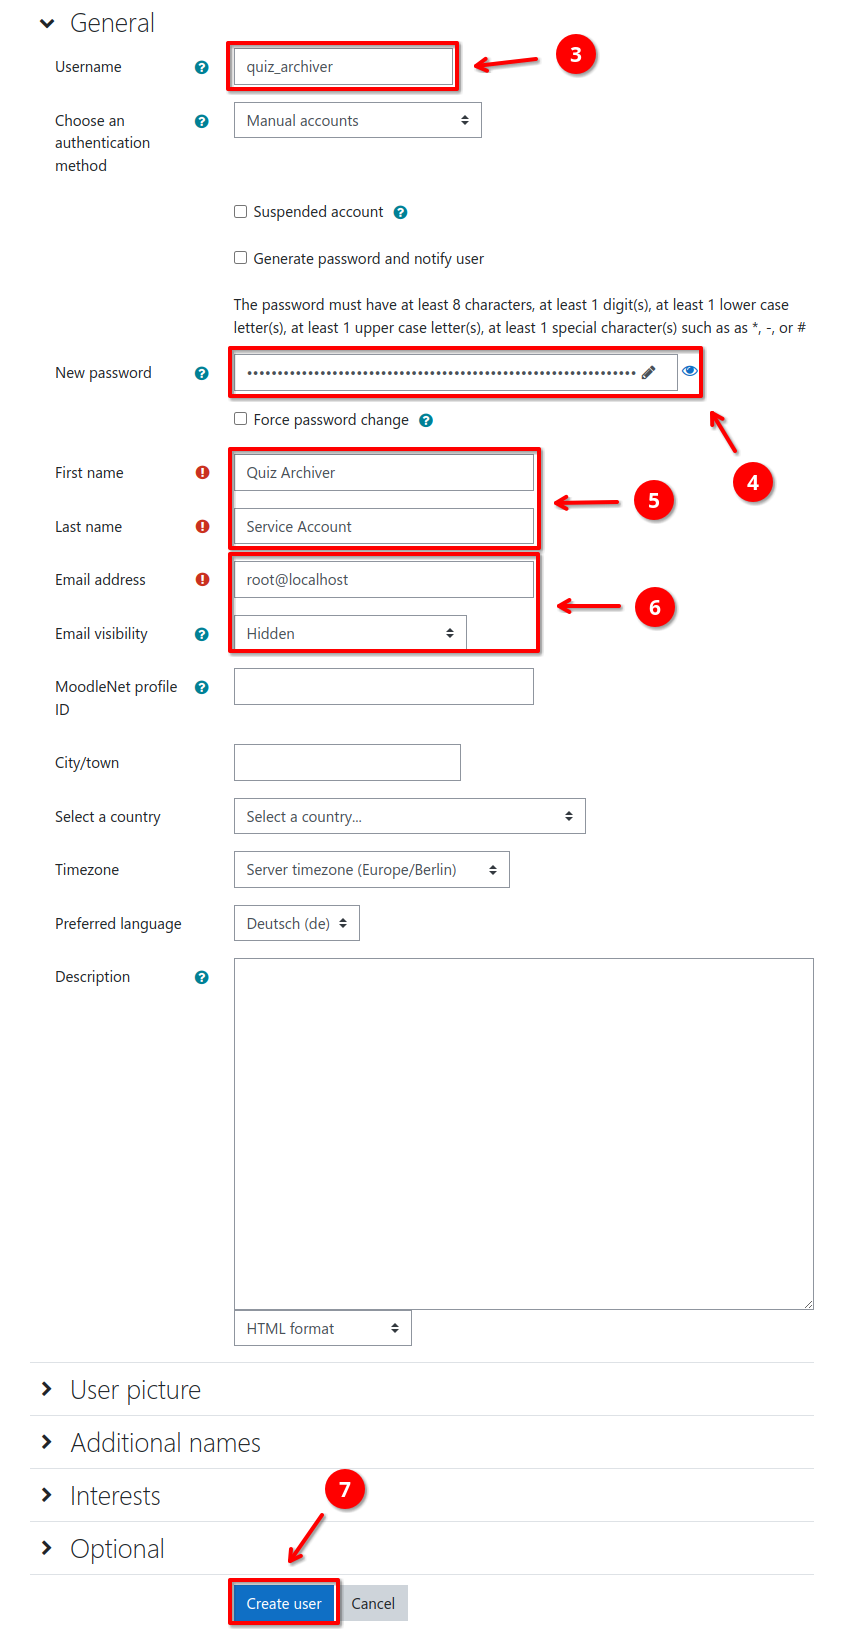
- Set a username (e.g.
quiz_archiver) 3, a password 4, first and lastname 5, and a hidden email address 6 - Create the user 7
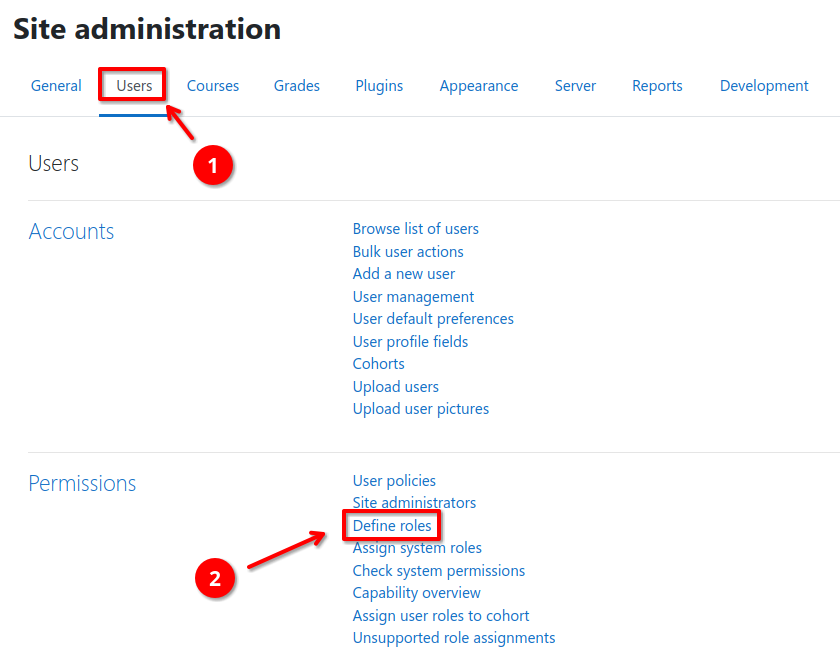
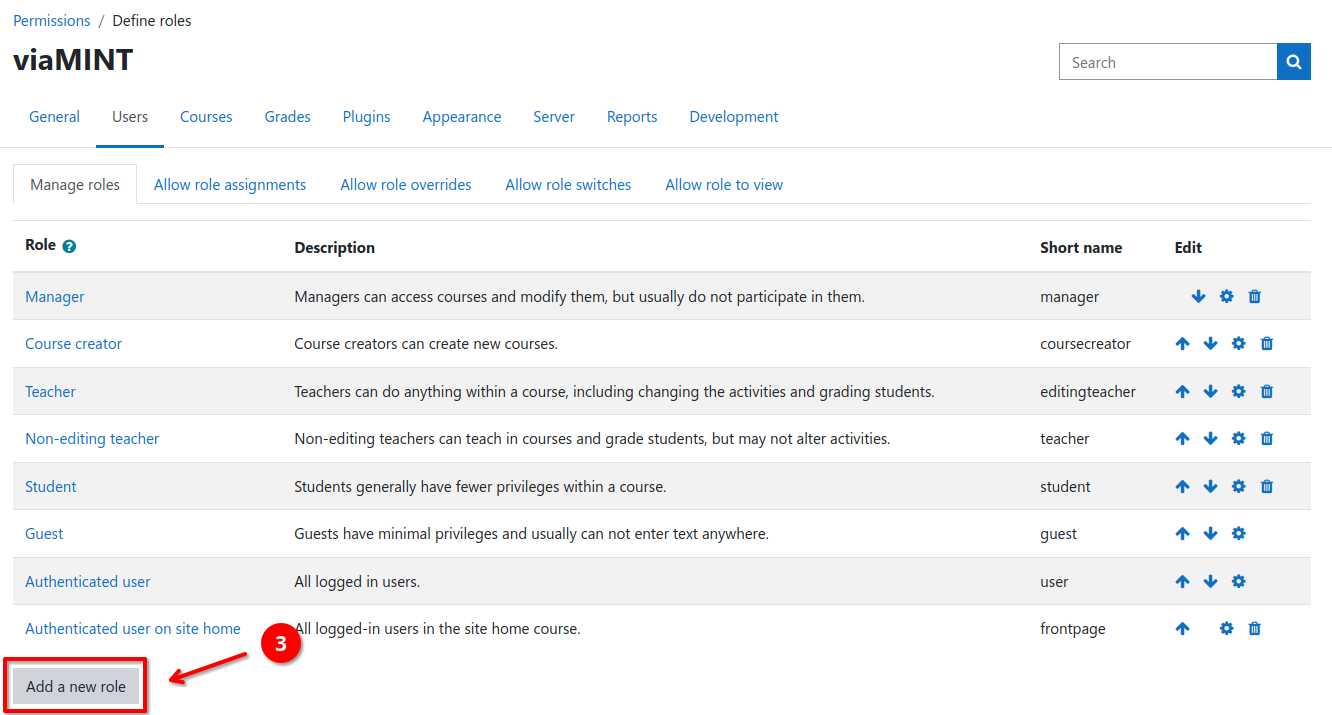
Create a global role to handle permissions for the quiz_archiver Moodle user
- Navigate to Site Administration > Users 1 > Permissions > Define roles 2
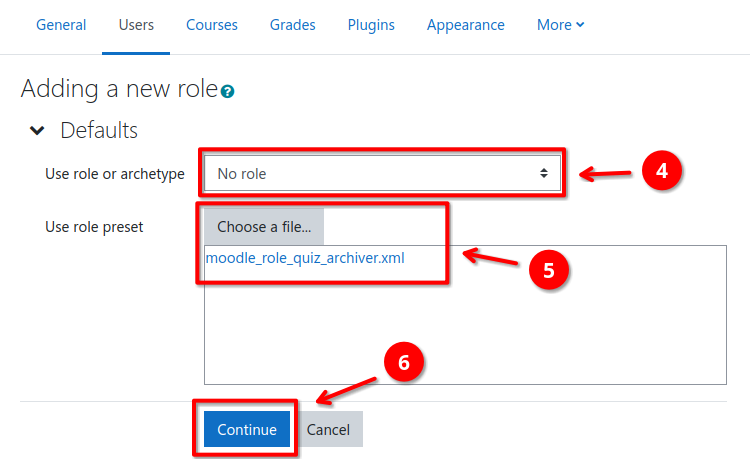
- Select Add a new role 3
- Set Use role or archetype 4 to
No role - Upload the role definitions file from
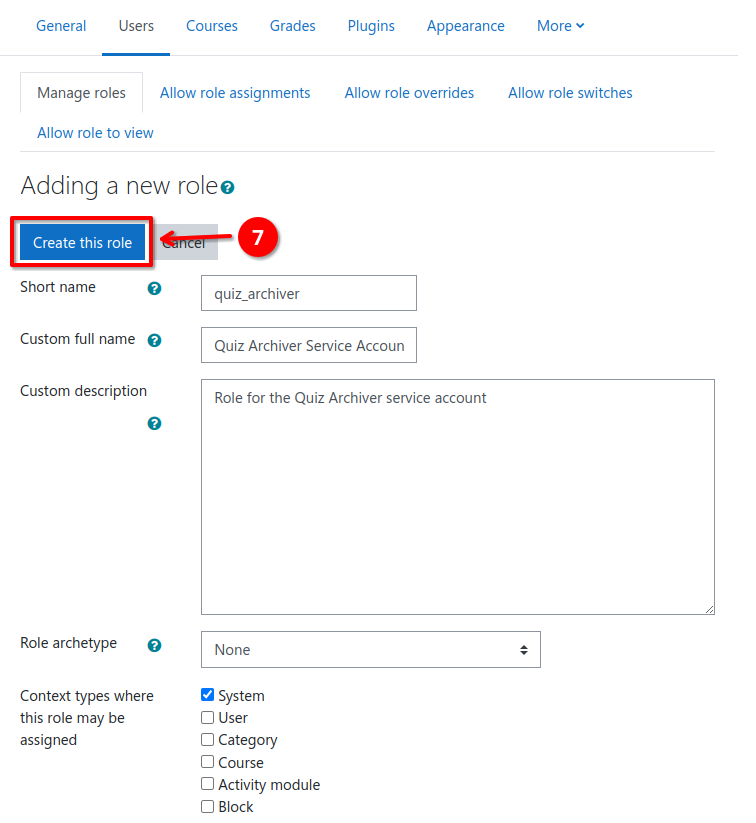
res/moodle_role_quiz_archiver.xml5. This will automatically assign all required capabilities1. - Click on Continue 6 to import the role definitions for review
- Optionally change the role name or description and create the role 7
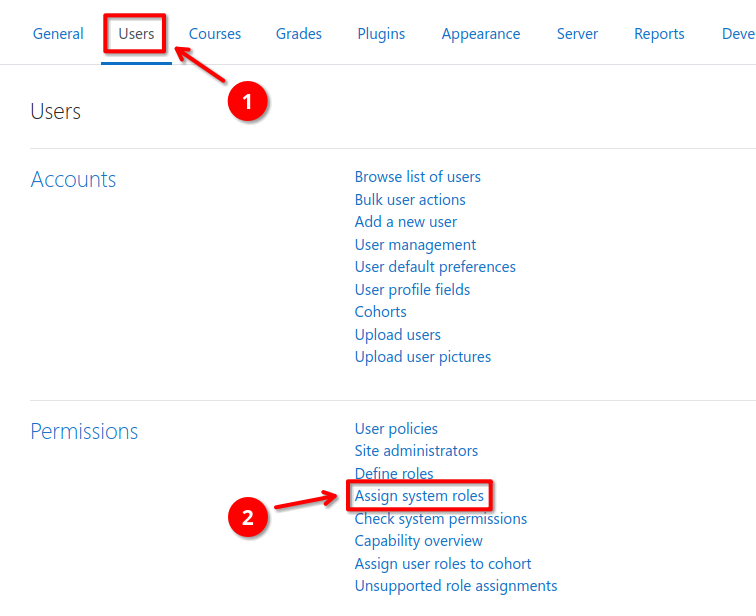
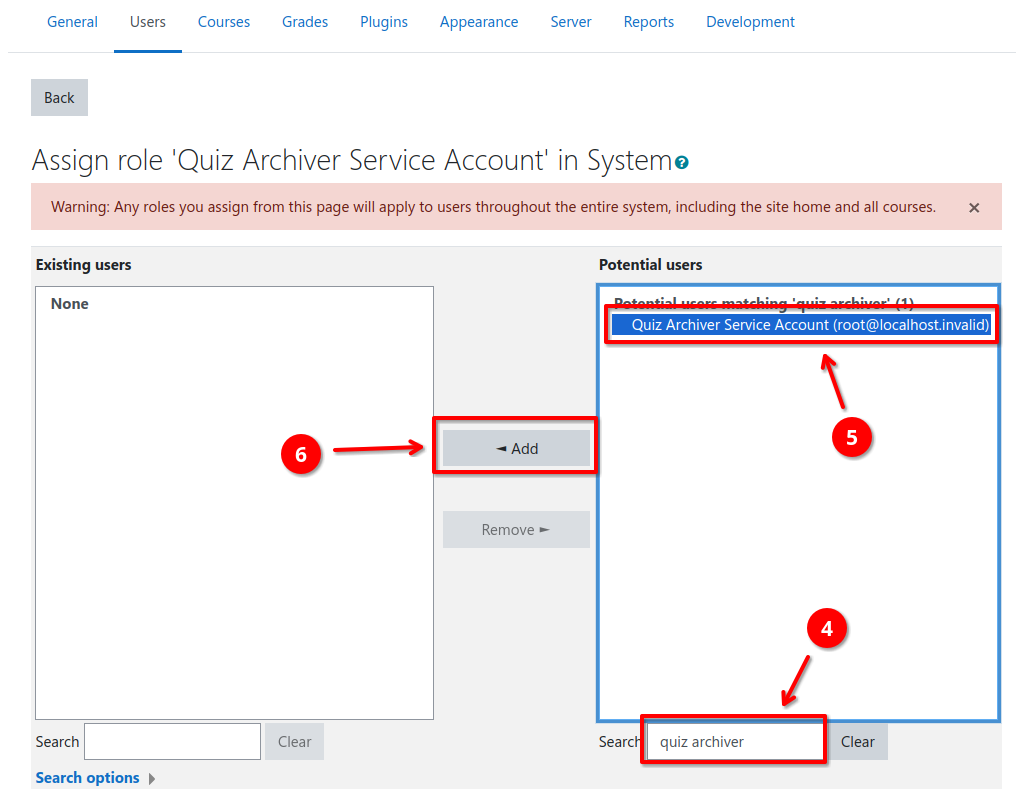
Assign the quiz_archiver Moodle user to the created role
- Navigate to Site Administration > Users 1 > Permissions > Assign system roles 2
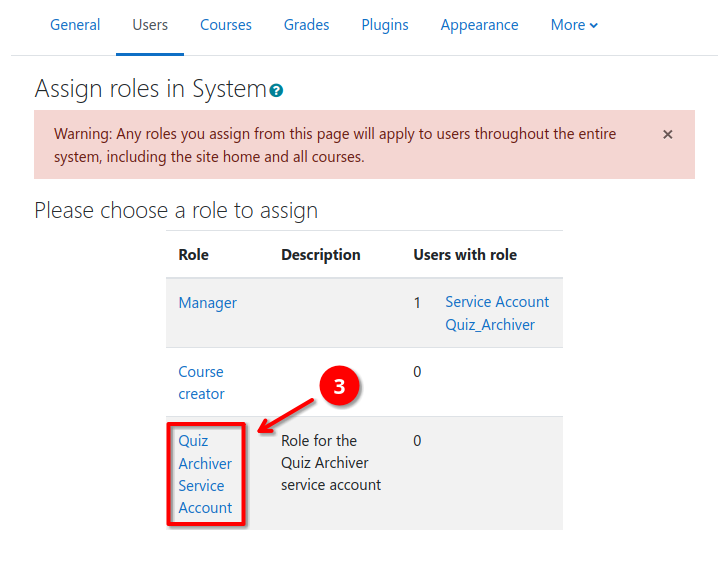
- Select the
Quiz Archiver Service Accountrole 3 - Search the created
quiz_archiverMoodle user 4, select it in the list of potential users 5, and add it to the role 6
Setup Webservice
The quiz archive worker service interacts with the Moodle platform using the Moodle webservice API. Therefore, it must be enabled and a corresponding external service must be created.
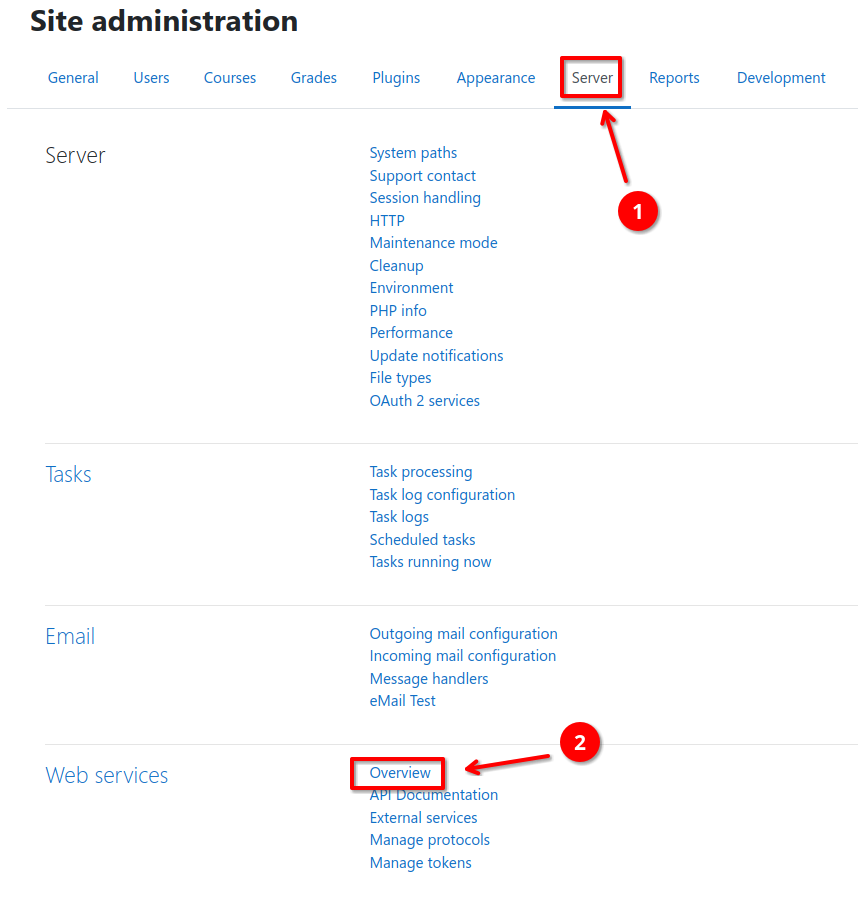
Enable webservices globally
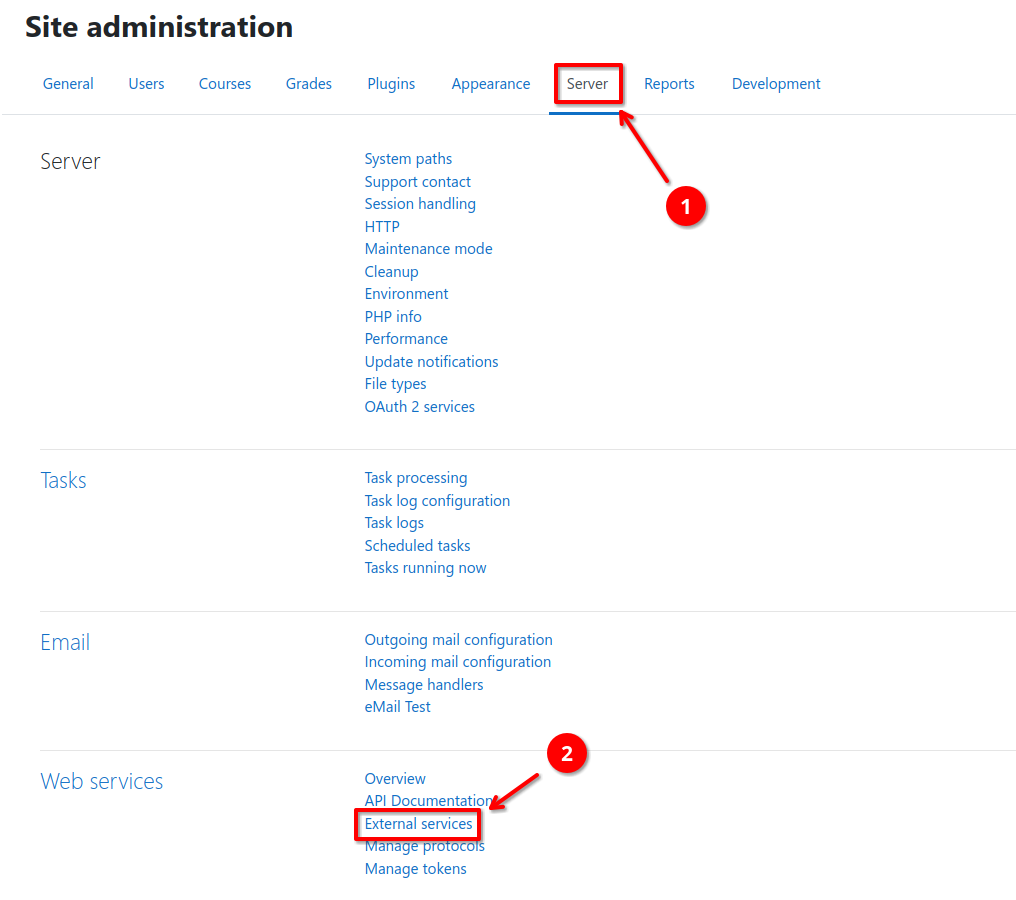
- Navigate to Site Administration > Server 1 > Web services > Overview 2
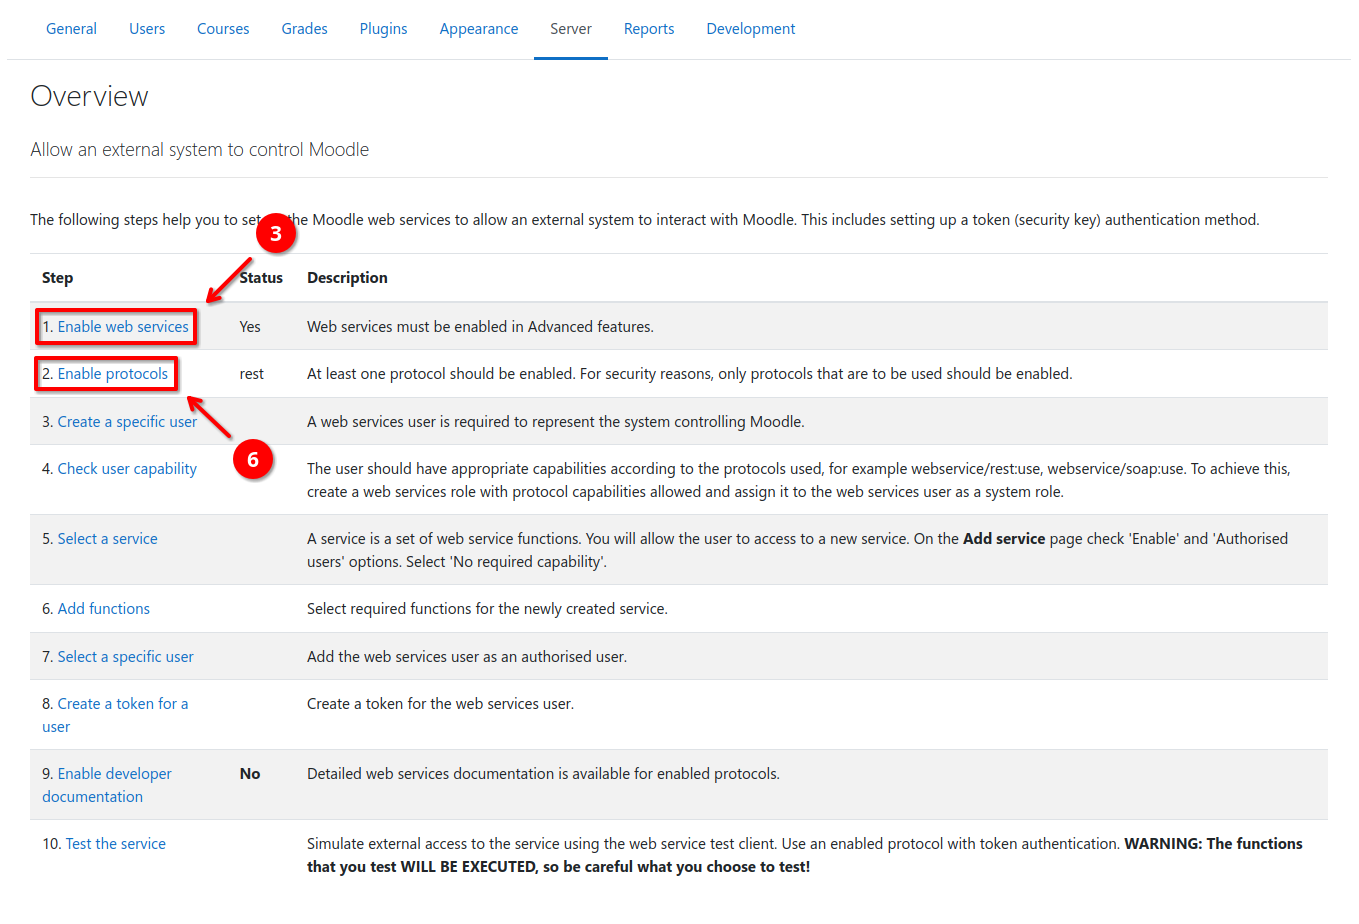
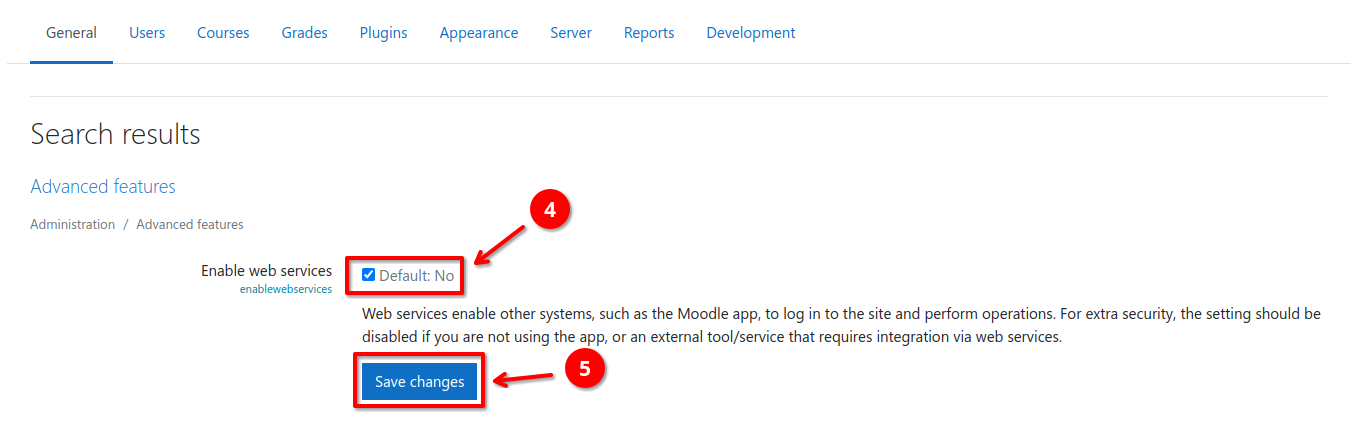
- Click on Enable web services 3, check the checkbox 4, and save the changes 5
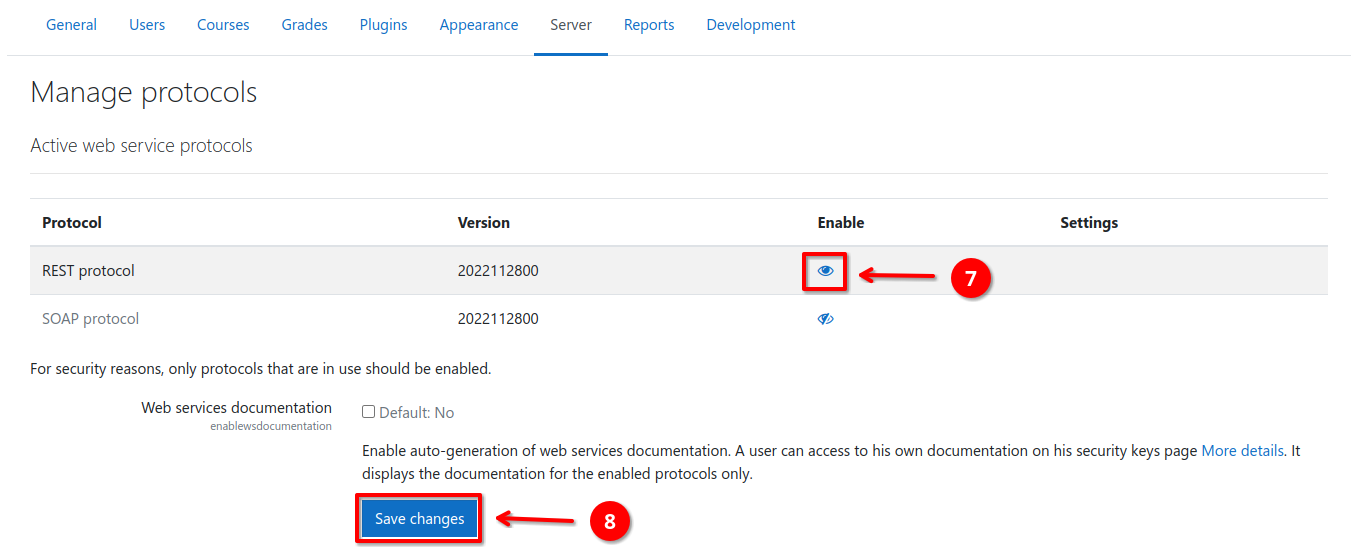
- Navigate back to the Overview 2 page
- Click on Enable protocols 6, enable the REST protocol 7, and save the changes 8
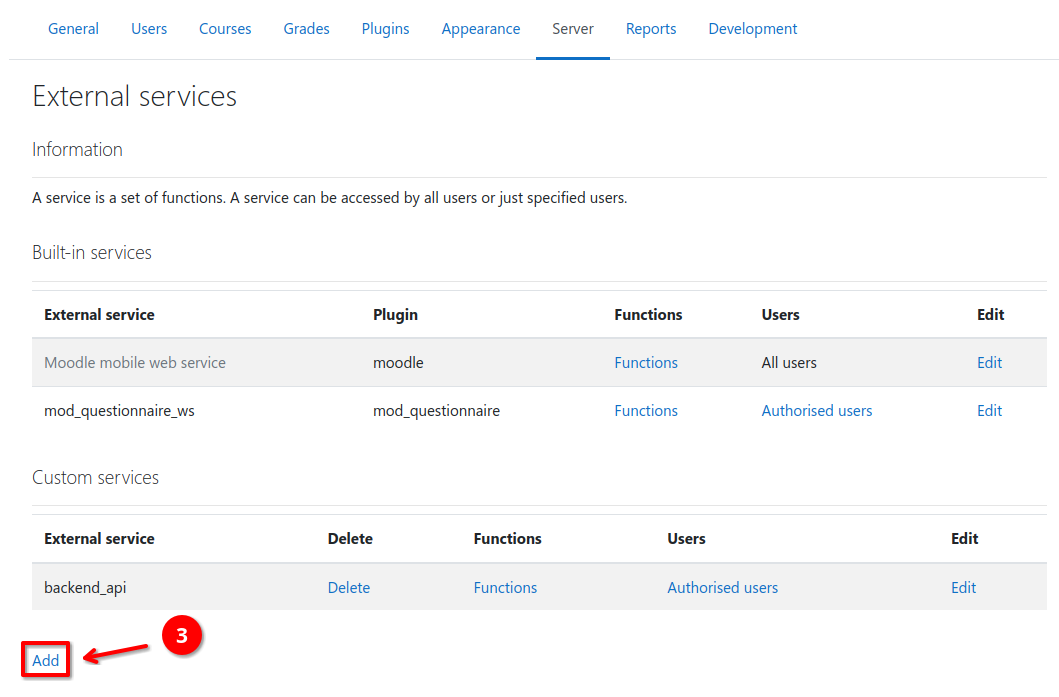
Create an external webservice for the quiz archive worker to use
- Navigate to Site Administration > Server 1 > Web services > External services 2
- Under the Custom services section, select Add 3
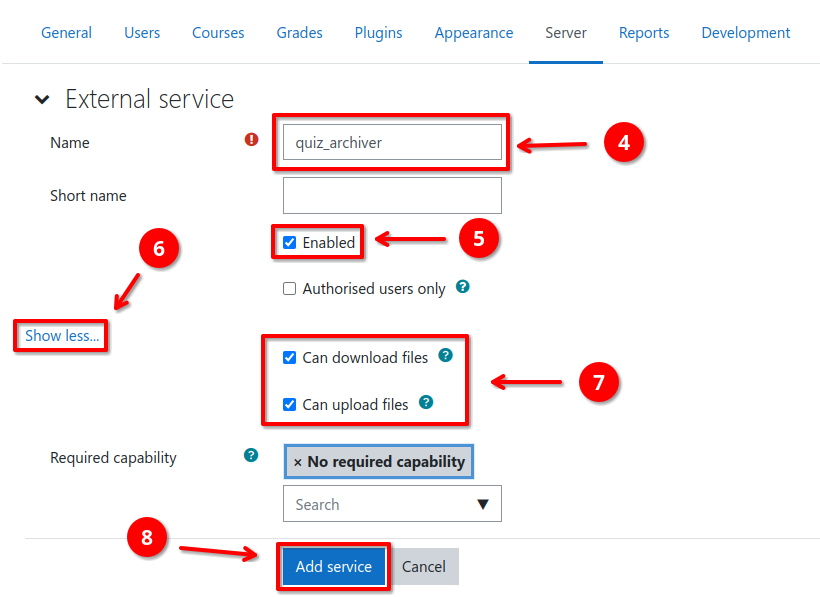
- Enter a name (e.g.
quiz_archiver) 4 and enable it 5 - Expand the additional settings 6, enable file up- and download 7
- Create the new webservice by clicking Add service 8

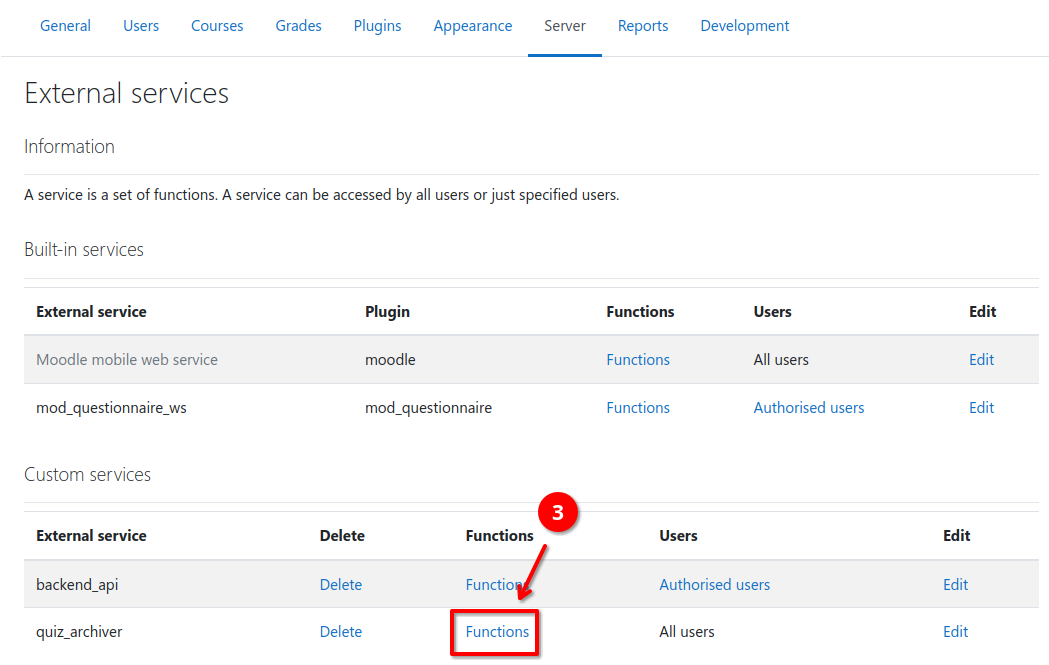
Add all quiz_archiver_* webservice functions to the quiz_archiver external service
- Navigate to Site Administration > Server 1 > Web services > External services 2
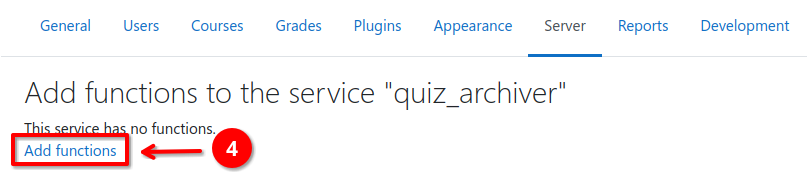
- Open the Functions page for the
quiz_archiverwebservice 3 - Click the Add functions link 4
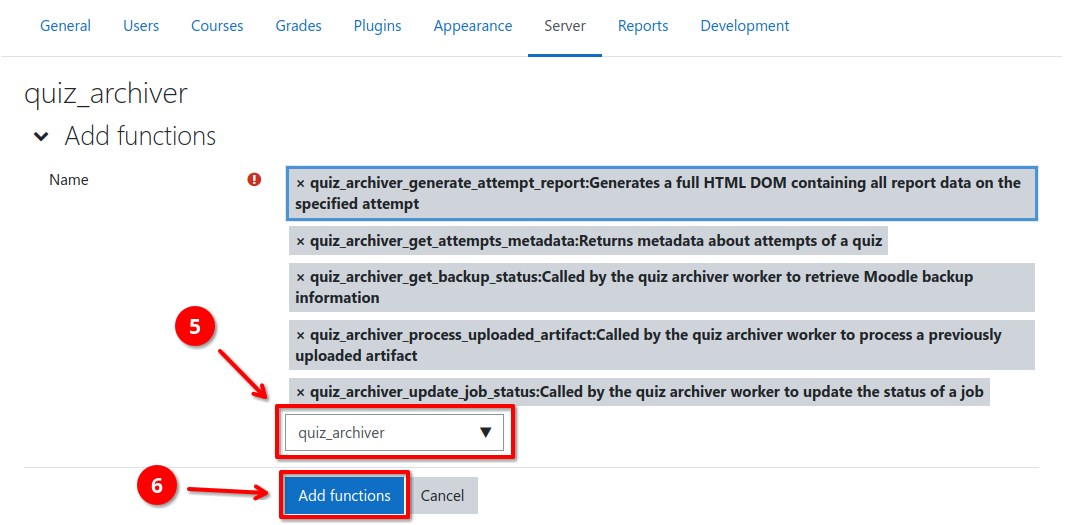
- Search for
quiz_archiver5 and add allquiz_archiver_*functions - Save the changes by clicking Add functions 6
Configure Plugin Settings
Once the user, role, and webservice are created, the last step is to configure the quiz archiver plugin to use the created webservice and user.
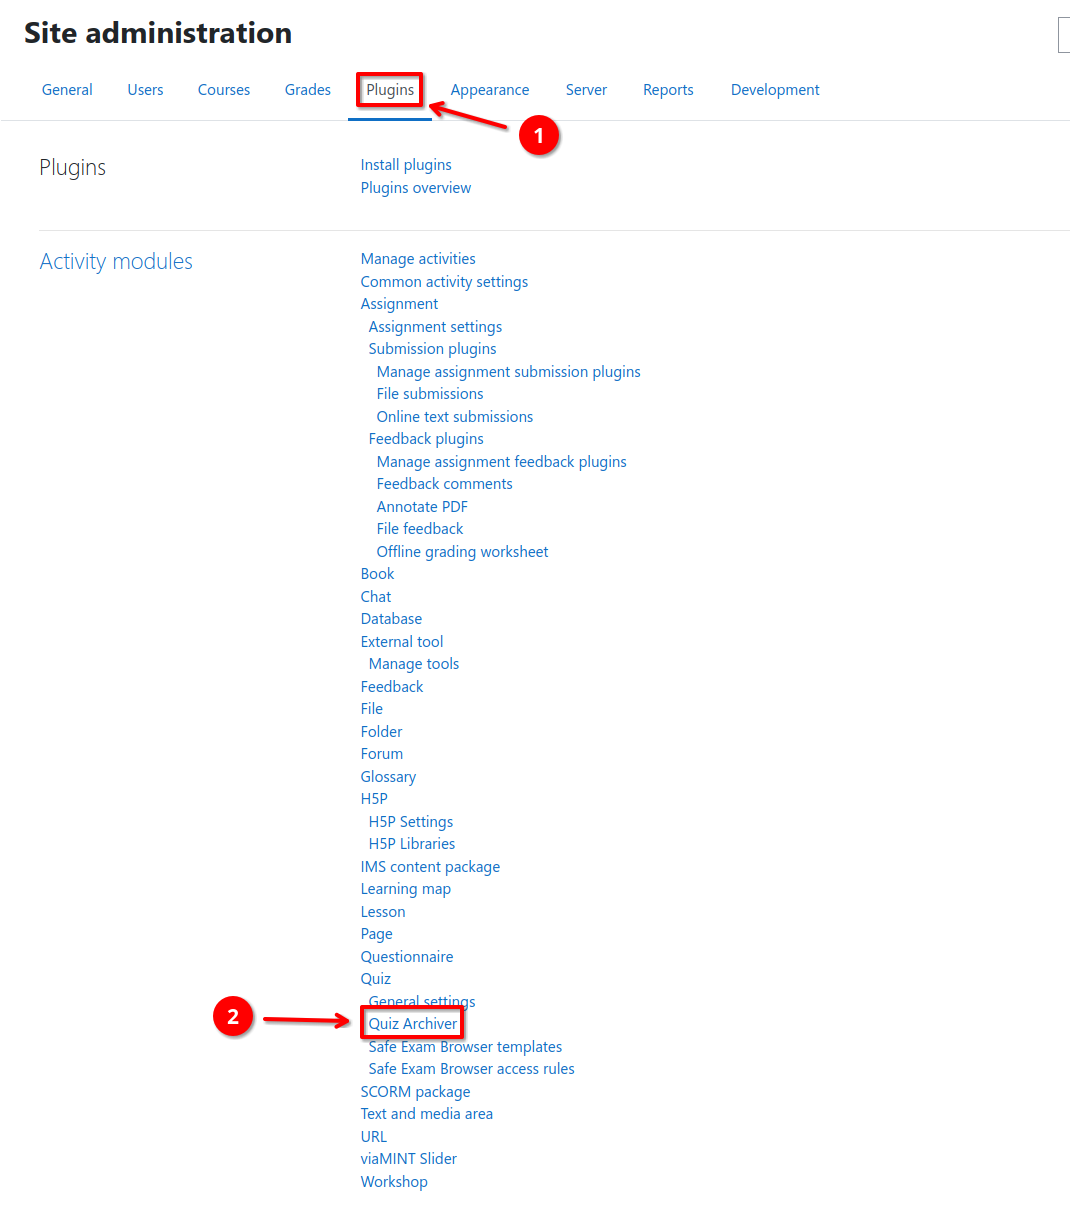
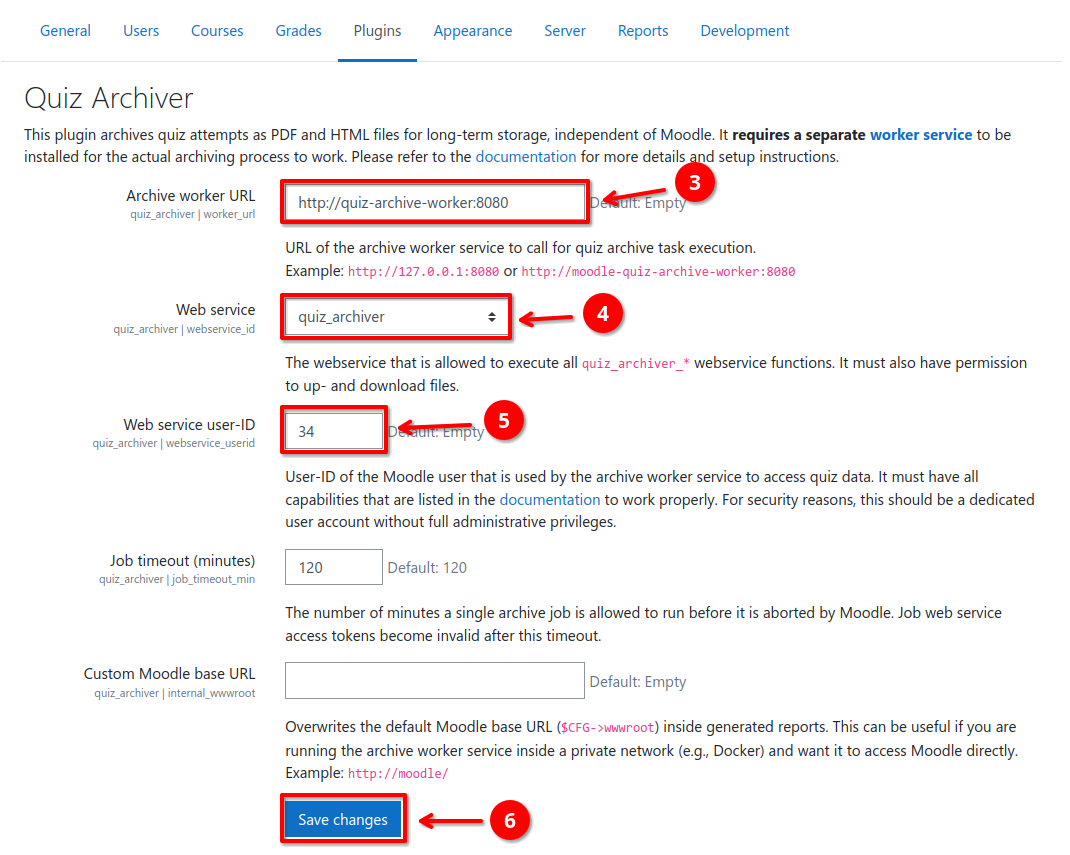
- Navigate to Site Administration > Plugins 1 > Activity modules > Quiz > Quiz Archiver 2
- Set
worker_url3 to the URL under which the quiz archive worker can be reached (e.g.,http://quiz-archive-worker:5000orhttp://127.0.0.1:5000) - Select the previously created
quiz_archiverwebservice forwebservice_id4 from the drop-down menu - Enter the user ID of the previously created Moodle user for
webservice_userid5. It can easily be found by navigating to the users profile page and inspecting the page URL. It contains the user ID as theidquery parameter. - (Optional) Specify a custom job timeout in minutes
- (Optional) Specify a custom Moodle base URL2.
- Save all settings and create your first quiz archive (see Usage).
- (Optional) Adjust the default capability assignments.
Next Steps
You finished the initial configuration of the quiz archiver plugin. You now can either directly start archiving quizzes (see Usage) or adjust the default plugin settings (see Job Presets / Policies).
-
You can check all capabilities prior to role creation in the next step or by manually inspecting the role definition XML file (
res/moodle_role_quiz_archiver.xml). ↩ -
This is only required if you run the quiz archive worker in an internal / private network, e.g., when using Docker. If this setting is present, the public Moodle
$CFG->wwwrootwill be replaced by theinternal_wwwrootsetting. Example:https://your.public.moodle/will be replaced byhttp://moodle.local/. ↩