Quiz Archive Signing (TSP)
Quiz archives and their creation date can be digitally signed by a trusted authority using the Time-Stamp Protocol (TSP) according to RFC 3161. This can be used to cryptographically prove the integrity and creation date of the archive at a later point in time. Quiz archives can be signed automatically at creation or manually later on.
Enabling Archive Signing
Prior to the first archive signing, the TSP service must be set up once within the plugin settings. To do so, follow these steps:
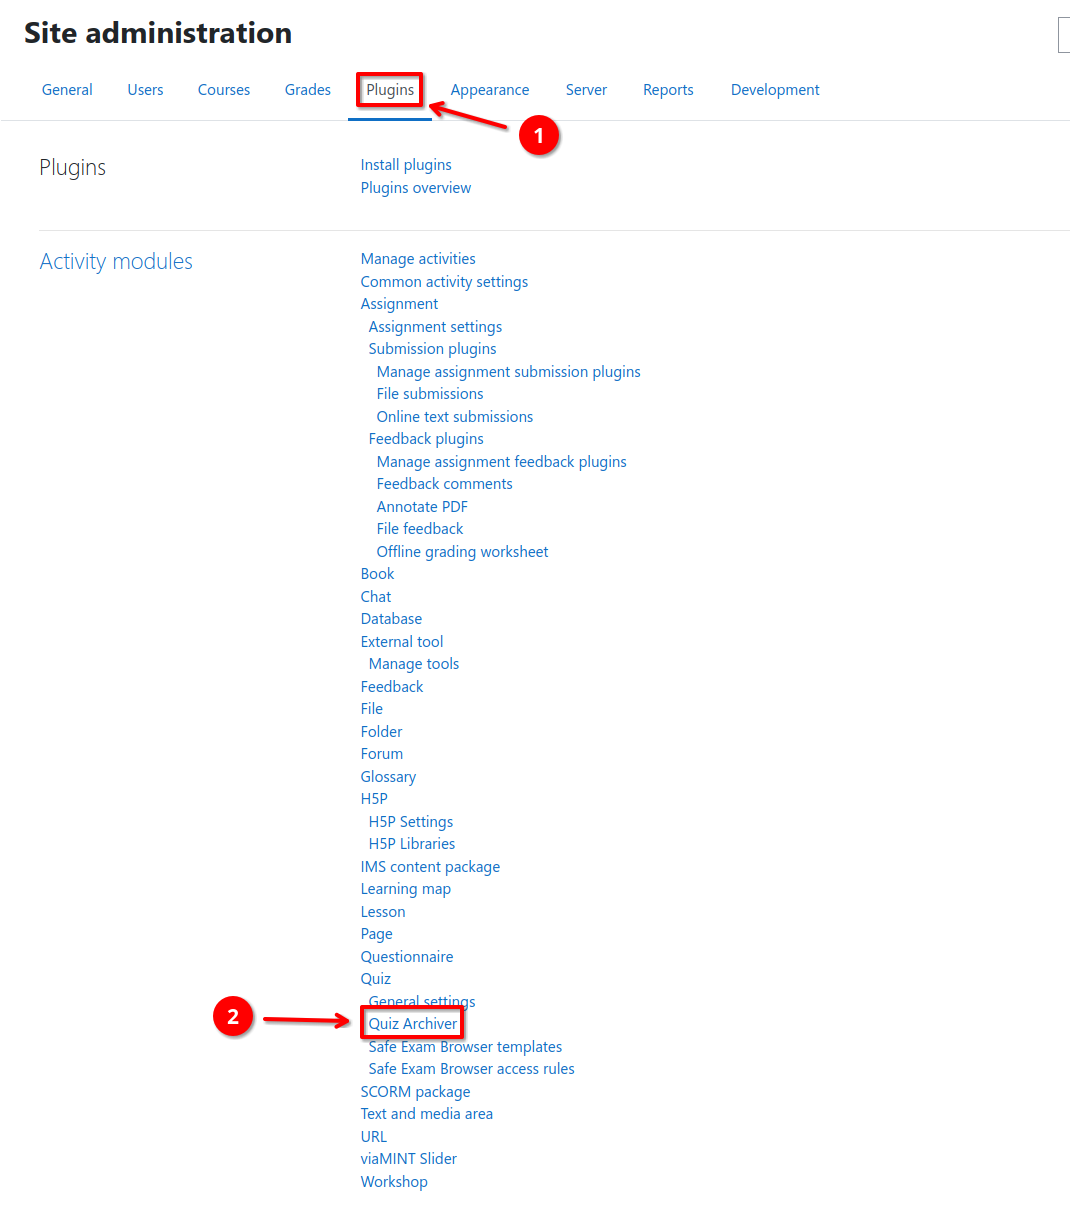
- Navigate to Site Administration > Plugins 1 > Activity modules > Quiz > Quiz Archiver 2
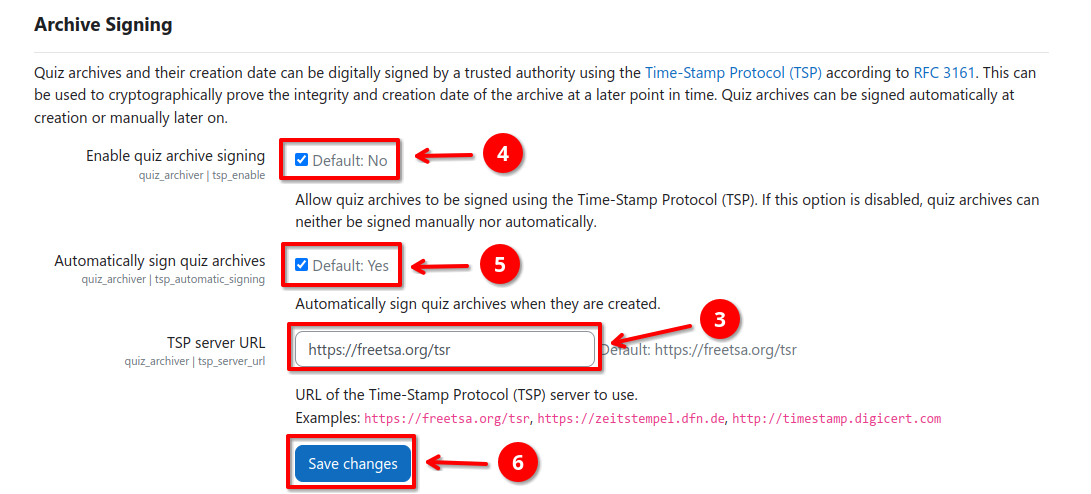
- Set
tsp_server_url3 to the URL of your desired TSP service - Globally enable archive signing by checking
tsp_enable4 - (Optional) Enable automatic archive signing by checking
tsp_automatic_signing5 - Save all settings 6
Signing Quiz Archives
Quiz archives can be signed either automatically during their creation or manually at a later point in time.
Automatic Archive Signing
If enabled, new archives will be automatically signed during creation. TSP data can be accessed via the Show details button of an archive job on the quiz archiver overview page. Existing archives will not be signed automatically (see Manual archive signing).
Manual Archive Signing
To manually sign a quiz archive, navigate to the quiz archiver overview page, click the Show details button for the desired archive job, and click the Sign archive now button.
Accessing TSP Data
Both the TSP query and the TSP response can be accessed via the job details dialog. To do so, navigate to the quiz archiver overview page and click the Show details button for the desired archive job.

Validating an Archive and its Signature
To validate an archive and its signature, install openssl and conduct the
following steps:
- Obtain the certificate files from your TSP authority (
.crtand.pem)1 - Navigate to the quiz archiver overview page and click the Show details button for the desired archive job to check
- Download the archive and both TSP files (
.tsqand.tsr) - Inspect the TSP response to see the timestamp and signed hash value
- Execute:
openssl ts -reply -in <archive>.tsr -text
- Execute:
- Verify the quiz archive (
<archive>.tar.gz) against the TSP response (archive.tsr). This process confirms that the archive was signed by the TSP authority and that the archive was not modified after signing, i.e., the hash values of the file matches the TSP response.- Execute:
openssl ts -verify -in <archive>.tsr -data <archive>.tar.gz -CAfile <tsa>.pem -untrusted <tsa>.crt - Verify that the output is
Verification: OK
Errors are indicated byVerification: FAILED
- Execute:
- (Optional) Verify that TSP request and TSP response match
- Execute:
openssl ts -verify -in <archive>.tsr -queryfile <archive>.tsq -CAfile <tsa>.pem -untrusted <tsa>.crt - Verify that the output is
Verification: OK
Errors are indicated byVerification: FAILED
- Execute:
-
The certificate must be given by your TSP authority. You can usually find it on the website of the service. ↩